

How To Cover Nail Holes In A Mantle
I love to make beautiful things past paw, merely it'southward and so tough to get those smooth finishes you lot see on mill-fabricated products. There'south nix similar a nail and screw hole to distract you lot from otherwise lovely project. But never fear—wood filler is hither! I tin teach you how to use woods filler to patch nail and screw holes for a crazy smooth finish.
Nosotros recently finished re-making our born shelves in my craft room, turning them from just wearisome shelves into shelves with built-in hutches and extra storage. During this project, Greg had to fill a LOT of nail and screw holes, and he taught me his trick to filling them in crazy shine. You'll want to do this with a product known a forest filler, which is sometimes chosen forest putty or forest plastic. It's a petty dissimilar than how you might have learned to practice it — even different from how the manufacturers recommend yous do it. Just the finished outcome is amazing. Greg knows his stuff.
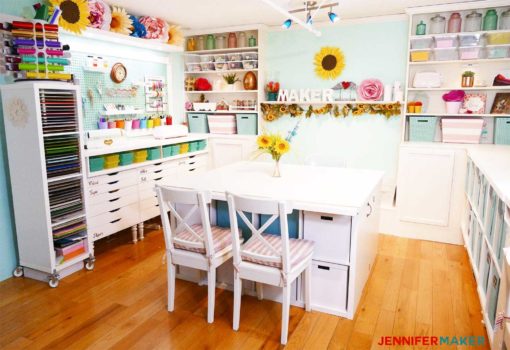
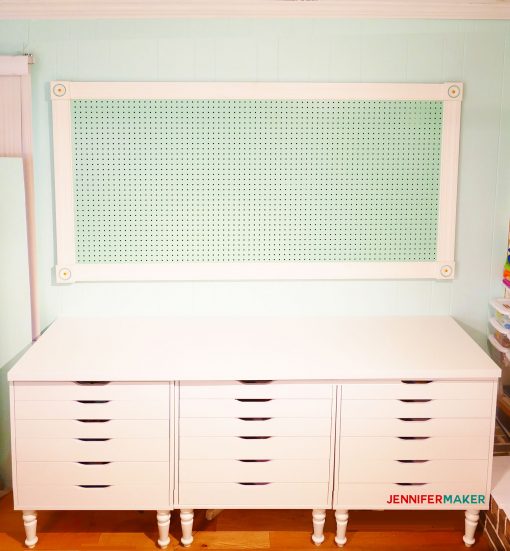
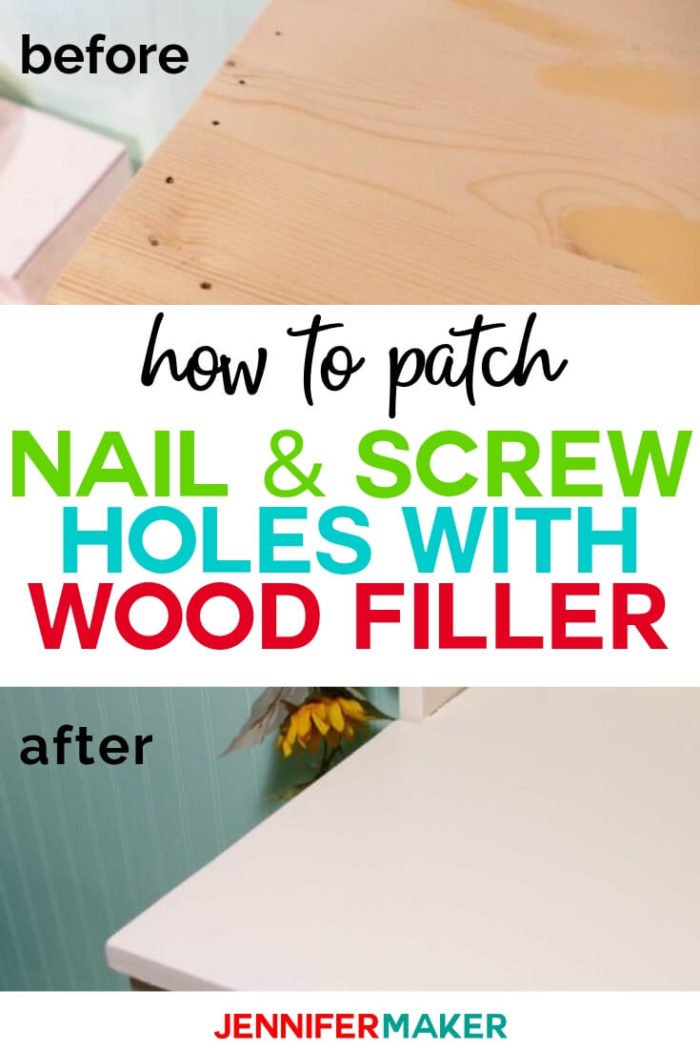
This wood filler technique is great for filling nail holes, screw holes, scratches, gouges, fries, and a variety of imperfections in wood. We recently used this flim-flam to hibernate the spiral holes when hanging upwards the large framed pegboard in my arts and crafts room. Tin yous tell where we screwed it in?
Then let me show y'all Greg'south crawly wood filler trick!This post contains some chapter links for your convenience (which means if you make a purchase later on clicking a link I volition earn a small committee but it won't toll you a penny more than)! Read mytotal disclosure policy.
Materials Needed to Utilize Wood Filler for a Shine Finish
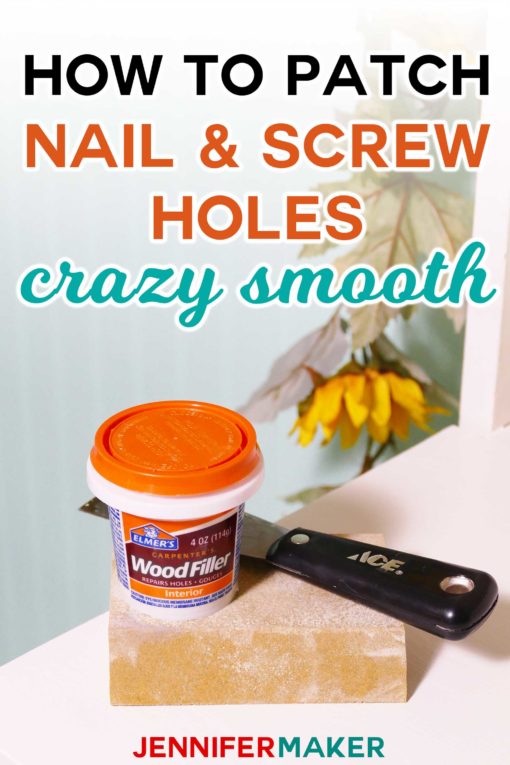
- Acrylic-based wood filler (Greg likes this kind) — note: if you want to stain the wood after y'all fill up it, make sure y'all use stainable wood filler
- Putty knife
- Clammy paper towel or rag
- Sandpaper or sanding block (fine grit)
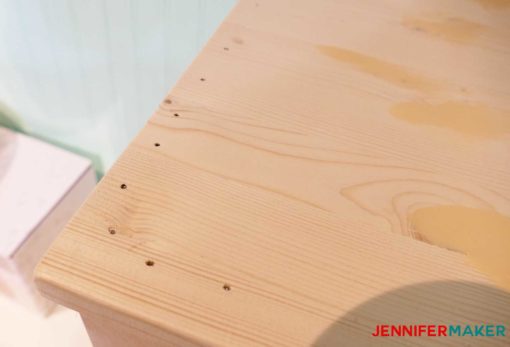
- Wood with a boom hole, screw pigsty, scratch, gouge, bit, or scissure
Note: Forest filler/wood putty comes in 2 types: Acrylic-based and nitrocellulose-based. Acrylic-based wood filler is the more traditional type and the type nosotros're using for this technique. Nitrocellulose-based forest putty dries extremely fast, and so it doesn't work well for this super smooth cease technique—you also need to use acetone to make clean nitrocellulose-based forest filler, rather than water, making it a niggling more finicky.
The Trick to Smoothing Nail and Screw Holes with Forest Filler
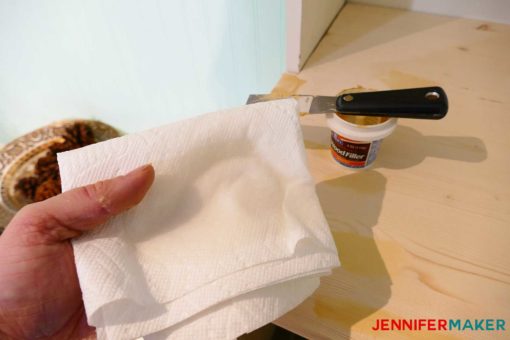
First, clean the forest you want to fill up with the wood filler. $.25 of dirt, dust, paint chips, and wood particles will only stand up in your way of getting a pretty, polish finish. You may as well want to sand any rough edges near the area y'all plan to set up (simply exist certain to clean up that wood grit when you lot're done). A damp rag works best for cleaning, simply you tin also apply a high quality paper towel (but brand sure information technology doesn't just shred and leaves $.25 behind).
Next, scoop out a small amount of wood filler with your putty knife and apply it liberally across the woods with the imperfections. Don't be afraid to really smear information technology on, pressing into the woods (and imperfections) as you become. You want More forest filler than y'all recollect yous need considering the filler volition compress equally it dries. If you really have also much filler on your wood, scrape your putty knife over the surface to remove the extra. Simply make sure there's a good layer of wood filler over the nail holes, screw holes, or other imperfections.
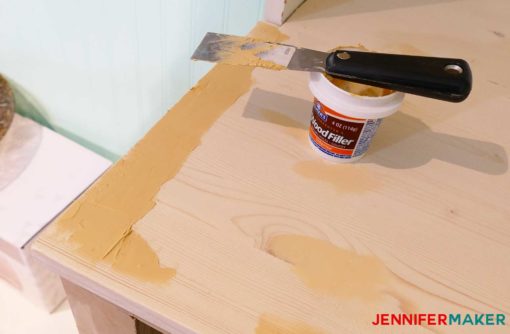
Now permit the wood filler sit for five minutes. Information technology should non exist dry completely before you lot move on to the next footstep.
How to Get the Wood Filler Crazy Polish
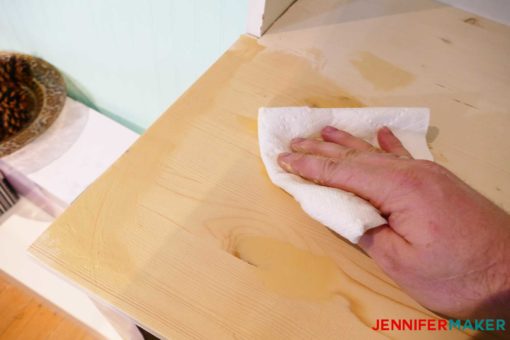
Next, using your clammy newspaper towel or cloth, rub the area with the wood filler. Utilize a buffing movement over the wood filler and it will smooth it out nicely. This technique will work quickly, so no demand to overdo it. This is the magic play tricks for a smooth finish!!
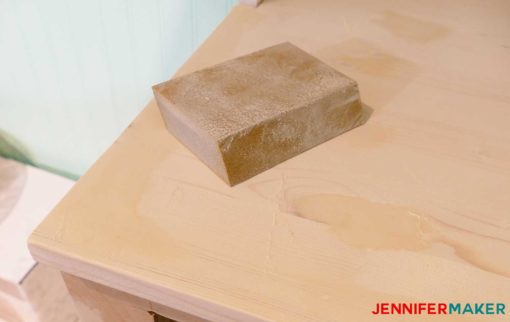
Wait for the wood filler to completely dry. When Greg made the built-in hutches, it took almost an hour to completely dry.
Once the wood filler is dry, sand the area smoothen with a fine sandpaper or sanding block until it is shine.
Finally, clean the area with another clammy cloth to remove any residual sawdust. And don't forget to make clean your putty pocketknife, too. You tin can clean the putty knife with water. Just be careful non to go any wood filler in your drain, or information technology volition clog information technology when it dries.
Wood Filler Tips and Tricks
If you want to stain your forest, practise it afterward the filler is stale, sanded, and cleaned.
Hither'south a tip: Test your wood filler and stain showtime before you do a big huge project — this tin salve y'all some headaches if it doesn't look the way y'all intended.
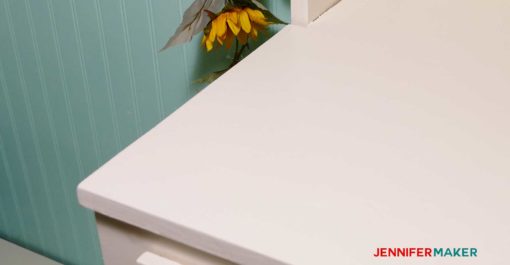
We didn't stain our hutches—nosotros just painted them in our favorite white paint (Swiss Coffee). We did put a LOT of coats of paint on, though, to make sure they were well protected from all the crafting they'll exist getting over the years. Run across how smooth this looks? Non only tin can you non tell where the holes were, but the finished result is crazy shine. Greg did great!
I hope yous enjoyed this tutorial! Information technology may not a cute DIY projection, just it's a tip that volition serve y'all well for all of your arts and crafts projects. Knowing how to properly finish your DIY projects is merely as important as all the awesome things you make!
Note: If you're trying to fill up in nail or screw holes in drywall, use spackling compound or drywall mud rather than wood filler. The technique for filling holes in drywall is very like to filling holes in wood. Here's a great blog mail service about how to fix nail holes in wood.
If you use this trick to patch your boom holes, please share a photograph of your project! You tin send it to [email protected] or tag me on social media with #jennifermaker.
Honey,

Want to remember this? Relieve this Hole Patching Trick to your favorite Pinterest lath!
Reader Interactions
Success! Now check your email to confirm your subscription to the thirty-Day Craft Room Organisation Challenge.


How To Cover Nail Holes In A Mantle,
Source: https://jennifermaker.com/how-to-use-wood-filler-to-patch-nail-screw-holes/
Posted by: collmanpurvile51.blogspot.com
0 Response to "How To Cover Nail Holes In A Mantle"
Post a Comment